Facebook Application Integration
We believe it is important to capture your audience where they find you. It’s time to start selling event tickets on Facebook. Once you install our Facebook application to your Facebook business page, events will automatically publish to your Facebook page within our application as they are set up in your Sparxo dashboard. In order to install our Facebook application, you must have a Facebook business page and you must be an ADMIN of the page.
TIP: You cannot install our application if you are an Editor or any other role for the page. You must be an ADMIN.
You also must have 2,000 likes or more on your Facebook fan page in order to install our application.
After you log in to your Sparxo dashboard, select the integration icon located on the left-hand navigation of your home dashboard.

Then go ahead and select “+Integrate” located next to Facebook.

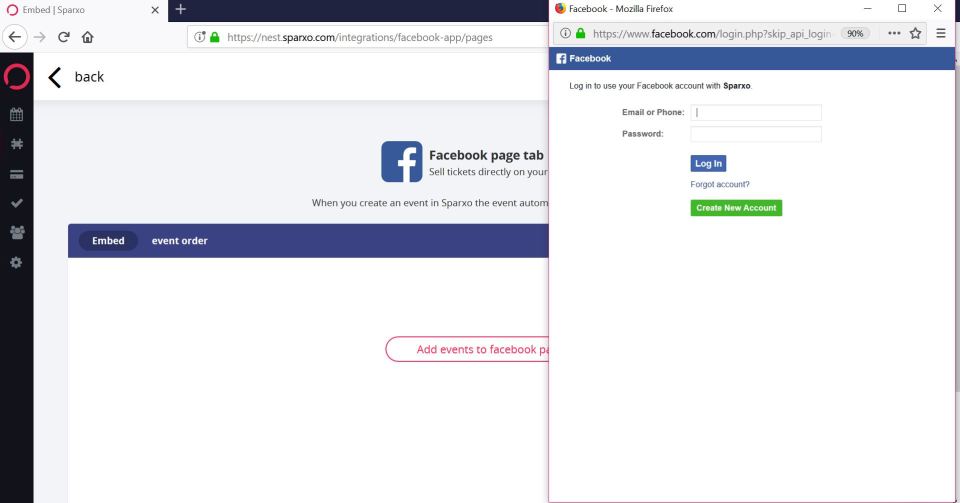
Next, select “add events to facebook page”.

A window will pop-up asking you to login to your Facebook account. After you enter your login credentials, go ahead and select “Continue as…”
You will then be asked to confirm which pages Sparxo can have access to. All of the Facebook pages you are an ADMIN of will automatically be marked with a checkbox. You should simply leave it as it is and select “Next”. Sparxo will not do anything with your Facebook page information or data other than installing our Facebook application if you should choose to do so now or in the future. After selecting “Next”, you will be asked what Sparxo is allowed to do with your page(s). Both options will automatically be turned on to YES. Please leave it on YES and select “Done” at the bottom.

Now you will see a list of all of the Facebook pages that you are an ADMIN of. Locate the page you want to install Sparxo on and select “embed”. Once you select “embed”, you will see a new tab located on your Facebook page called “Get Tickets!”. You can edit the words of that tab and change it to anything that you want such as “Buy Tickets” or “RSVP Here”. You can also move the placement of the tab upwards or downwards. Both of those actions must be done from the Settings section of your Facebook page.

Below is an example of what the tab will look like on your page.

Edit Your Sparxo Tab on Your Facebook Page
To edit the name of the tab or placement, go to your Facebook page and select “Settings” located on the top right corner.

Then select “Templates and Tabs” on the left-hand navigation.

Scroll down to locate the tab “Get Tickets!”. Select “Settings” located next to “Get Tickets!”. To edit the text on the tab, select “Edit Settings” on the bottom left corner.

Edit the text, select “Save” and then select “Okay”.

To change the placement or position of the tab upwards or downwards, simply select the icon on the left side that looks like three horizontal lines, then drag and drop the tab where you want it go to.
And you’re all set now to sell tickets on Facebook!